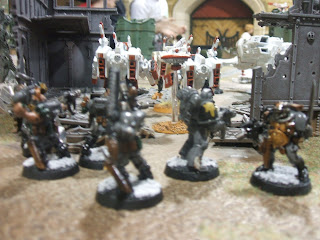
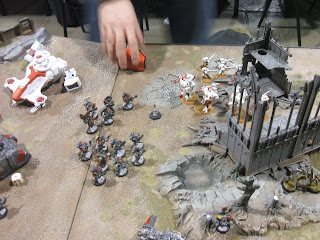
So in the Red Corner hailing all the way from the Eastern Fringe is CJB's Tau!
Commander Battle Suit - Missile pods and plasma rifles, 1 shield drone
3 Crisis Suits, Missile Pods and plasma rifles, 2 shield drones
3 Crisis Suits, 2x Twin Missile Pods and 1x Missile Pod / Fusion, 2 shield drones
4 Stealth Suits with Targetting Arrays and a Gun Drone
6 Fire Warriors with a Devilfish (fully upgraded)
6 Fire Warriors with a Devilfish (fully upgraded)
10 Kroot
Hammerhead Gunship with a Rail Cannon
Hammerhead Gunship with a Ion Cannon
3 Broadsides with 2 shield drones
..and the challengers in the Blue corner all the way from the Ice Wastes of Fenris....... MC Tic Tac's Space Wolves!
Rune Priest, Living Lightning, Murderous Hurricane, Chooser of the Slain
Rune Priest, Living Lightning, Jaws of the World Wolf
5 Wolf Scouts, Melta Gun
5 Wolf Scouts, Melta Gun3 Wolf Guard: 2 armed with a power fist and a combi melta each, 1 with a combi melta and a bolt pistol
10 Grey hunters, 2 Melta Guns, Wolf Banner, Mark of the Wulfen, with a Rhino
10 Grey hunters, 2 Melta Guns, Wolf Banner, Mark of the Wulfen, with a Rhino
5 Grey Hunters, 1 Melta Gun, with a Rhino
6 Grey Hunters, 1 Flamer, with a Rhino
3 x Land Speeder Tornado, Multi Melta, Heavy flamer
5 Long Fangs, 4 Missile Launchers
Razorback, Lascannon, Twin linked Plasma gun
5 Long Fangs, 4 Missile Launchers
Razorback, Lascannon, Twin linked Plasma gun.
We rolled for Mission and got, Capture and Control (1 objective each) Pitched Battle. I won the roll and set up first.
I set up my Rhinos line abreast roughly in the centre, with the Land Speeders behind the Rhino line - as I would not know how CJB would set up himself despite his objective being on my right as their is plenty of good cover on my left and in the middle. My Long Fangs made good of the tower and barricades in my deployment zone.
CJB set up mainly around his objective but with his Broadsides up in the tower in his zone and his commander behind it's barricades. His stealth team infiltrated behind the landing pad on my far right - very much a refused flank.
I put my objective right next to the Tower with my long fangs in, just behind the barricade.
CJB out his just out side of the ruins in his deployment zone.
I forgot to take a pic of our deployment Do'h!!
CJB didn't steal the 1st turn (thankfully for my SW).
Space Wolves Turn 1:
I push my Rhinos with the 10 man melta squads ahead 12 and pop smoke, but I send them around the crater with the disturbingly wrecked Rhino! The Land Speeders turbo boost 24 straight down the gullet of the Tau hoping to draw fire away from the Rhinos. My Rhinos with the smaller squads in with the Rune Priest push 6 forwards hoping to zap some tower with psychic powers.
Shooting began with my Rune Priest on the right using Jaws of the World Wolf to take down the 1 broadside *just* in range. The Long Fangs open up and mange to wreck the Hammerhead with the Rail Cannon! So 2 units shot and 50% of the Railguns gone! Living Lightning from my second Rune Priest manages to wound 2 Crisis Suits and a shield drone hiding behind the now wrecked Hammerhead - not too shabby for turn 1.
 |
| The 3rd Land Speeder is on the other side of the middle tower |
Tau Turn 1:
The Ion Cannon Hammerhead pushes down the right flank and kills the closest Rhino and kills 2 Grey Hunters in the blast who end up pinned! The Broadsides split fire and destroy the Rhino with the Jaws Priest in and the Razorback way out on the right flank. The wounded unit of Crisis Suits immobilise and thus kill the middle land speeder. The unit of suits in the ruins shaken the lead rhino and some how the other 2 land speeders avoid any damage.
 |
| The view from the Crisis Suits in the ruins |
Space Wolves turn 2:
I split the Jaws Rune Priest off from his unit so he can advance and sink another Broadside with Jaws as well as a Drone, the unit he was with jump in the empty Razorback that is behind their wrecked Rhino, which then scoots of behind the middle tower. The Land Speeders both mover over to the right and one manages to rip of the Ion Cannon from the last Hammerhead. The rest of my shooting pays for it's good round earlier and gets nullified by the Tau disruption pods - ie CJB kept rolling his 4+ cover saves!
 |
| The Jaws Rune Priest fancies his chances - Not! |
 |
| End of Space Wolf Turn 2 and things don't look so good for them as their line starts to falter |
Tau Turn 2:
The Last Broadside dispenses some revenge and kills the Rune Priest who killed his 2 squad mates.
The central lead Rhino gets blown up and between the explosion and pretty much all the Tau fire power only the 2 Grey Hunters with Melta Guns survive, but get pinned! The Kroot turn up on the right flank and between them and the pesky Stealth Suits wreck the Land Speeder that took out the Ion Cannon on the last Hammerhead. Said Hammerhead goes on to the Land Pad - going over to contest the SW objective if it gets the chance to.
Overall a very good turn for the Greater Good!
(sadly I missed a pic of this turn of devastation!)
Space Wolf Turn 3:
The Wolf Scouts arrive! One unit form CJB's Board edge and one from the right.
My last Rhino put's it foot down so to advance and threaten the Tau objective and hopefully draw some fire away from the dismounted Grey Hunters. The disruption pods continue to annoy the Long Fangs, but hey do kill the last Hammerhead on the landing platform. The Scout's melta shooting manges to immobilise a Devilfish which they then krak open in combat while the other unit fluffs their combat vs the Crisis Suits in the Ruins, but hold.
A bad turn for the Space Wolves......
 |
| Start of SW turn 3... |
 |
| A blurry pic of a unit of scouts sneaking up on a devil fish |
 |
| The other unit of scouts get the drop on the Greater Good's finest.... |
 |
| The aftermath of the sudden appearance of the Scouts. |
Tau Turn 3:
With the enemy in their midsts and behind them the Tau turn tier attentions to the unit that destroyed the devil fish and erase the scouts from existence while the Wolf Guard who was with them runs off! Mean while all the Commander and last Broadside can do is stun the last Rhino. In combat the Kroot pile in to the Scout & Crisis Suit combat and solve the remaining scout problem. The last Devil fish pushes forward to block the last SW Rhino and kills 1 of the 2 Grey Hunters with Melta Guns and the lone Grey Hunter runs away!
 |
| The Kroot solve the scout problem: |
 |
| End of Tau Turn 3: |
Space Wolf Turn 4:
I disembark my Rune Priest and his unit. The Long Fangs kill the wounded unit of Crisis Suits the where hiding behind the wreckage of the Hammerhead. The lone Melta Gunner rallies, advances and destroys the Devilfish that killed his mate! The 6 Fire Warriors lose 2 to the explosion but before the survivors gather their senses 2 units of Grey Hunters and a Rune Priest rip them to pieces and their consolidation sees them just able to contest the Tau objective.
 |
| End of Turn Space Wolf Turn 4 |
 |
| Objective in sight |
Tau Turn 4:
The remaining unit of Crisis Suits kill the Rune Priest's unit and the last Broadside shoots him in the back and kills him. The Kroot advance but fail their terrain test to charge the last unit of Grey Hunters.
Space Wolf Turn 5:
The last unit of Grey Hunters make a bee line for the Kroot. 1 Unit of Long Fangs launch 4 frag missiles at the last unit of Fire Warriors and CJB rolls poorly and the Fire Warriors get fragged to death. the 2nd unit of Long Fangs try the same trick on the Kroot but only kill 4, while the Grey Hunters kill another 1 with their pistols. IN combat the Grey Hunters easly kill the remaining Kroot leaving the Tau with no scoring unit's left.
 |
| The Grey Hunters pile into the Kroot as the Stealth suits look on... |
 |
| ....... and after as the Stealth Suits jet pack away from the angry Grey Hunters! |
Tau turn 5:
With noting but pride left to play for the Crisis suits reduce the last unit of Grey Hunters to a man and then charge...... The Grey Hunter counter charges back and wounds a battle suit. The battle suits cause 4 wounds on the lone Grey Hunter who ducks and dives his way to safety to win the combat! CJB then rolls a 11 for his LD test and the Suits try to flee but the last Grey Hunter cuts them down in bloody revenge for his squad mates!!
 |
| The Crisis Suits pile in....... |
 |
| .. but the lone Grey Hunter has other ideas as he runs them down!! |
Turn 6 ends up being the Stealth suits killing all the lone survivors of the Grey Hunters as the Long Fangs try to shoot them.
At the end of Turn 6...................
 |
| My objective safely held..... |
 |
| The Long Fangs overlook what remains of well everything!!!!!! |
So after a very bloody game the Space Wolves hold and take the day, but the costs where very, very high! So high in fact if it was kill points the Tau would of won!
Overall a very good game that swung back and forth but the sheer bloody mindedness of the Space Wolves kept them strong till the end. A great game against a great opponent in Commandojimbob and I'm sure he will want to get his own back next time!

Nice battle report. Nice pictures to boot!
ReplyDeleteCouple of questions for you. Do you find that having 2 squads of scouts is worth it? I don't usually run two. I usually run enough Wolf Guards to put one in each Grey Hunter Squad. Its true that I don't get two Melta's but I think the fist and Combi-melta make up for it.
Also, why put the speeders in a squadron?
Anywho, nice report. I liked it a lot.
First off thanks! :)
ReplyDeleteThe Land Speeders are not in a squadron, that's me being lazy in the formatting!
With the Wolf Scouts I have found them to be take 2 squads or none at all, as 1 bad roll can take a squad out of the fight, but having 2 squads gives me a better chance of getting in a place to cause some real damage and make a nuisance of themselves and hold up/distract the enemy fire support/line.
That's how I like to play my scouts anyway.